Exposing a Self-Hosted Service Securely with Cloudflare Tunnel
If you are a bit like me, passionate about networking and systems, you have probably wanted to host your own services at home instead of paying for cloud subscriptions. It costs less, you keep control of your data, and honestly, when you love IT, it is a great playground.
My goal was simple: access my self-hosted services from anywhere, on my phone as well as on my laptop. But exposing a service from your home to the internet is not as trivial as it sounds. Two very different problems were waiting for me.
First, the dynamic IP. For most home connections, the public IP address is not fixed: it changes regularly, especially every time the router restarts. A domain that points to the right IP today can be broken tomorrow.
Second, and much more serious, security. To expose a service, you have to open your public IP to the whole world. And the internet is constantly scanned by bots, many of them malicious, sweeping entire IP ranges in search of the smallest flaw. Exposing your personal IP directly, without HTTPS and without any protection in front of it, is not just risky: it is a direct door to your home network.
Here is how I solved both, in two steps. As for the prerequisites: a domain name (ideally on Cloudflare, whose free services are impressive), solid networking basics (DNS, proxy, API) and a bit of Python.
Step 1: taming the dynamic IP
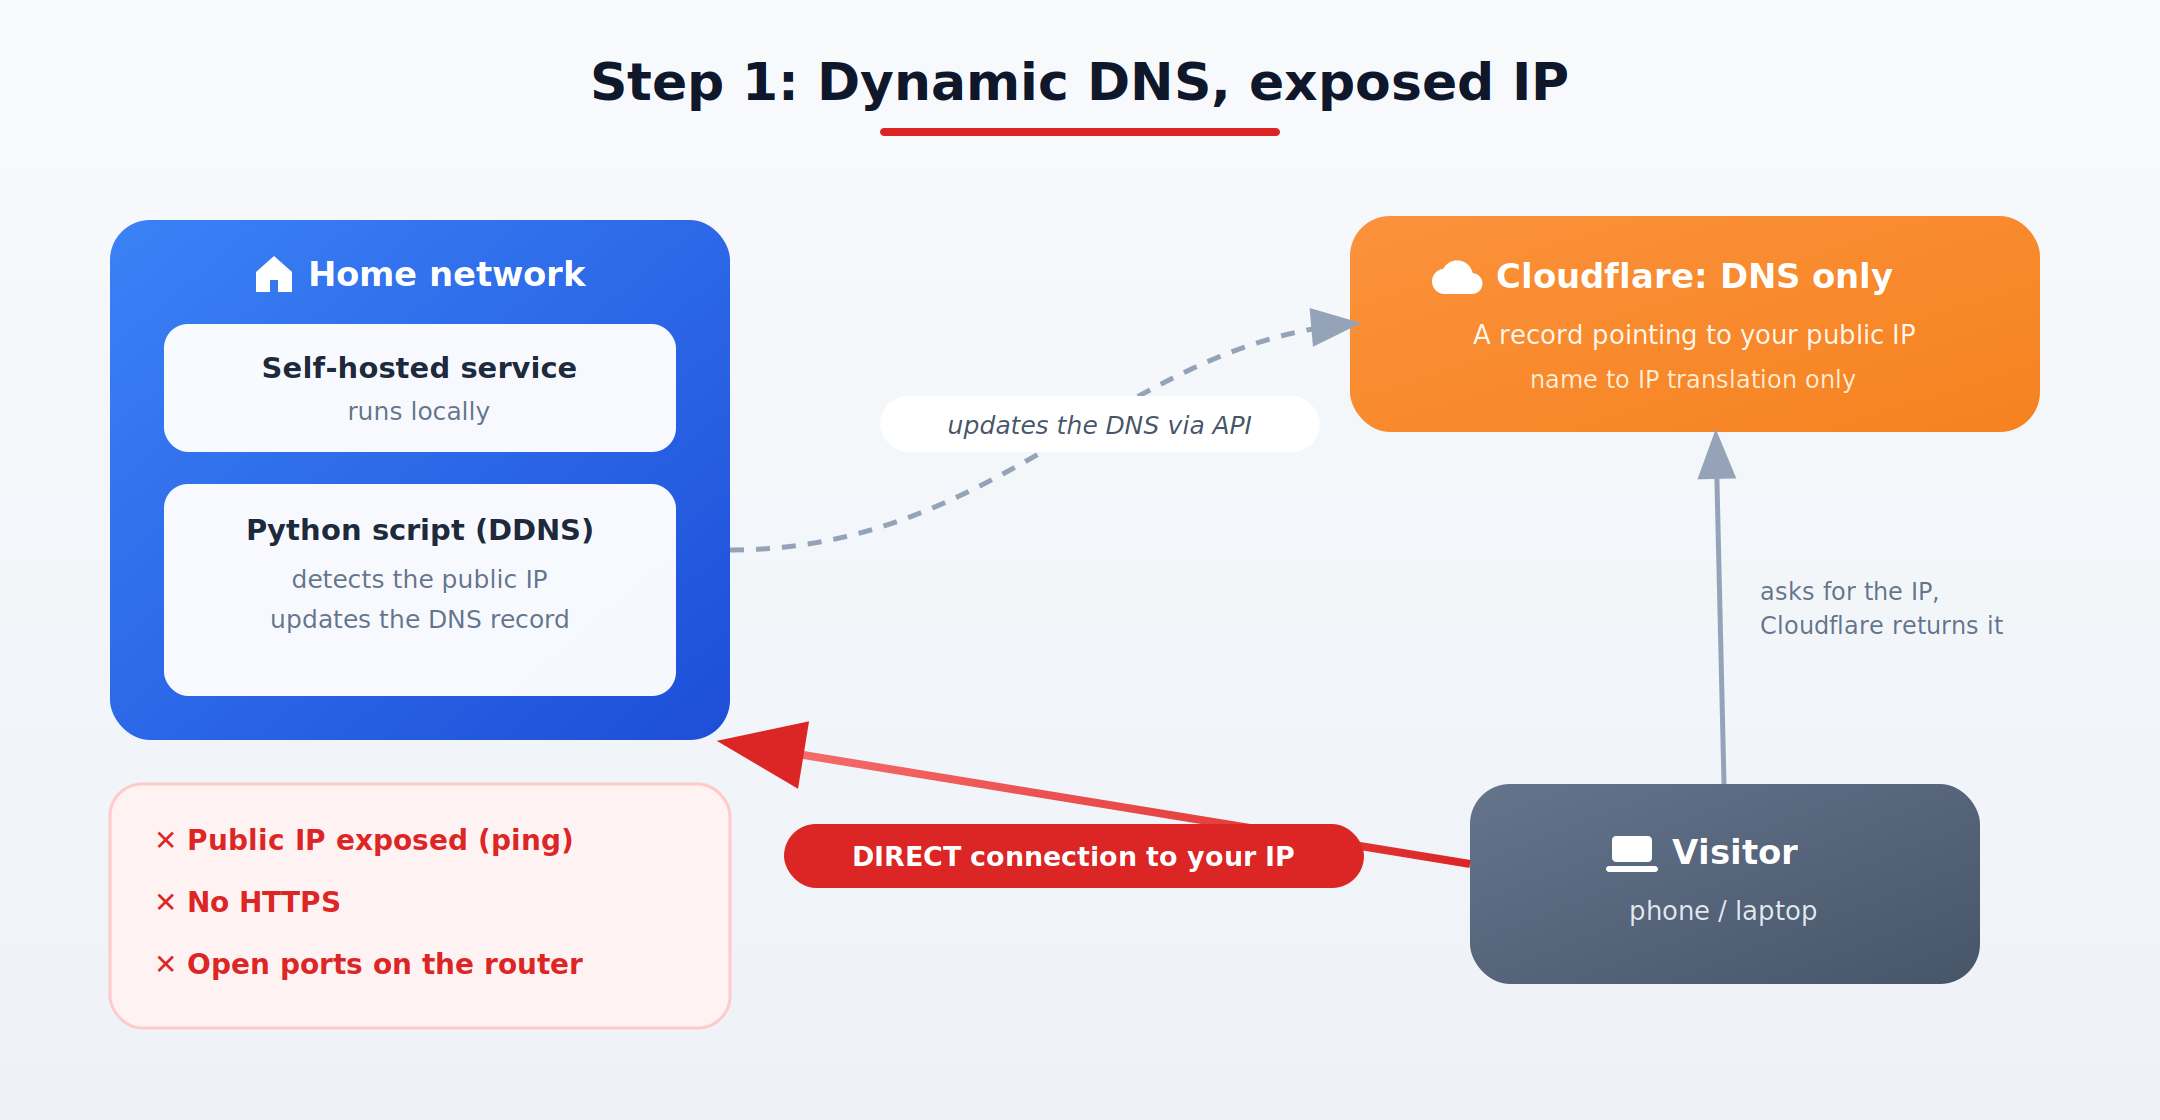
My first idea was a homemade dynamic DNS (DDNS) written in Python. The principle: the script first retrieves my current public IP, then calls the Cloudflare API to update the DNS record of my domain with that new IP. A Windows scheduled task runs it at every startup, and the job is done.
The API call looks like this (fake values):
PUT https://api.cloudflare.com/client/v4/zones/{zone_id}/dns_records/{record_id}
Authorization: Bearer cf_example_token_1234567890abcdef
Content-Type: application/json

{
  "type": "A",
  "name": "my-domain.com",
  "content": "203.0.113.42",
  "proxied": false
}
One security reflex along the way: the Cloudflare token must never sit around in plain text. Keep it in a separate, protected configuration file, never hardcoded in the script, and certainly never on a public repository.
It worked. I was happy… until I realized I had just solved the least important problem.
Step 2: the Cloudflare Tunnel
My script handled the dynamic IP, but my domain still pointed straight to my real public IP: a simple ping revealed it, and there was still no HTTPS. I needed something else. Not to chase my IP, but to make sure it was never exposed at all.
The solution is called Cloudflare Tunnel, and it completely reverses the logic. Instead of opening my network to the outside, my PC establishes an outbound, encrypted connection to Cloudflare, through a small program called cloudflared. Visitors now go through Cloudflare, which forwards the request through the tunnel to my local service.
If you have ever used a VPN, the mechanism will feel familiar: like a VPN tunnel, cloudflared opens an encrypted, permanent, outbound connection, with no inbound port to open. The difference is the direction. A classic VPN lets you get in from the outside into a private network. Here it is the opposite: my server goes out to Cloudflare, and Cloudflare becomes the public, secure entry point of my service. This is sometimes called a reverse tunnel.
The configuration simply maps a domain to a local service (fake credentials):
tunnel: 00000000-aaaa-bbbb-cccc-1234567890ab
credentials-file: C:\path\to\credentials.json

ingress:
  - hostname: my-domain.com
    service: http://localhost:8080
  - service: http_status:404
This single change of approach completely hides my IP, adds automatic HTTPS, removes any open port on my router, and makes the dynamic IP irrelevant. The DDNS script from step 1 became useless.
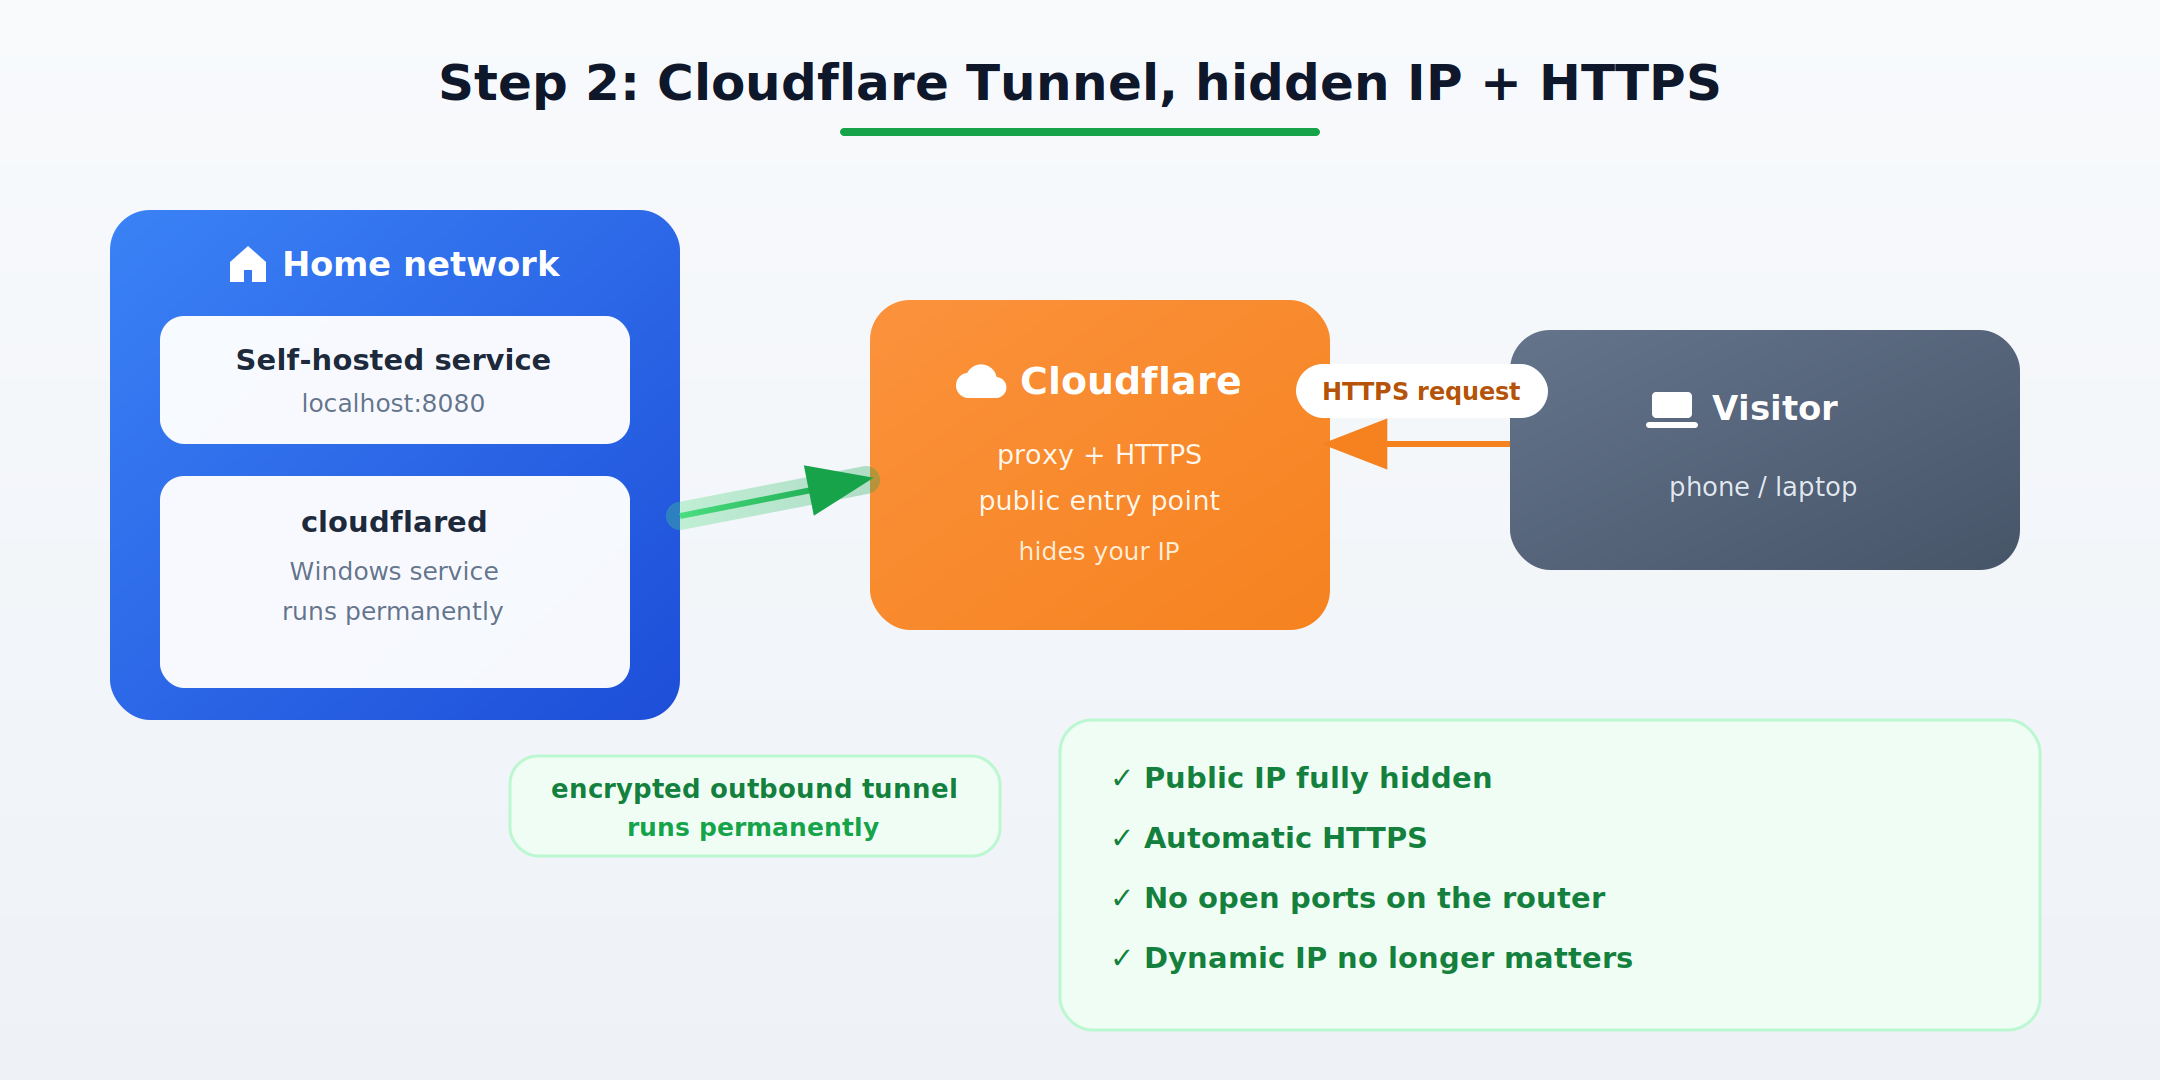
One last thing remained: keeping the tunnel running at all times. So I installed cloudflared as a Windows service. Unlike a scheduled task, a service runs continuously in the background, under the system account, and restarts on its own. My service is now reachable over HTTPS, from anywhere, without me touching anything.
Do not forget the login page
The tunnel hides my IP and encrypts the traffic, but it does not change one simple fact: anyone who knows my domain can reach the login page of my service. That page is now the real front door, and it deserves the same level of attention as the rest.
My rules are simple. The username has nothing to do with the domain: no “admin”, no first name, just something long and unique, never used anywhere else. Same logic for the password: at least 20 characters, or better, a passphrase. A password manager makes this painless.
If you want to go further, enable two-factor authentication (2FA) if your service supports it. And for the truly paranoid, Cloudflare can even require a client-side SSL certificate, so only your own devices can reach the page at all. That was more than I needed for now, but it is good to know the option exists.
What this project taught me
What started as a simple wish for remote access made me work with a lot of concrete concepts: dynamic DNS, APIs, Python scripting, tunnels, proxies, HTTPS certificates and a persistent Windows service.
But the real lesson is somewhere else. My first solution worked, except it solved the wrong problem. It is by trying to do things properly and securely that I found a simpler and stronger approach. In IT, the first solution that works is not always the right one: taking the time to understand the real problem often leads to a much more elegant answer.